Assalamualaikum...

Thursday, 10 May 2012

Macromedia Flash: Symbol Types

Macromedia Flash: Symbol Types

http://www.dummies.com/how-to/content/macromedia-flash-symbol-types.html

 
Flash offers a way to simplify your work, called symbols. A symbol can be any object or combination of objects, animation, or a Web button. When you create a symbol, the objects (or animation) become one symbol. The difference is that Flash stores the definition of the symbol in the Library. From the library, you can now effortlessly insert multiple copies of the symbol into your movie. Each copy is called an instance.
Besides making your life easier when you want to use a set of objects more than once, symbols have another advantage: They significantly reduce the size of your files. Rather than store each instance you use, Flash stores one definition for the symbol and only refers to the definition each time you display an instance of the symbol. Turning a bunch of objects into a symbol helps reduce file size even when you use the symbol only once, because Flash remembers only one object rather than many. Backgrounds that aren't animated can therefore be combined into one symbol.
You can place symbols inside other symbols. Used this way, symbols are the building blocks for complex graphics and animation. Motion-tweened animation requires symbols, groups, or text, so you often create symbols when preparing to animate.
So, symbols are all-around good guys, and you should use them as much as possible.
Flash makes available three types of symbols. Each type is made up of a group of objects or animation, but each type has a different purpose. Understanding these types is very important to understanding symbols and Flash animation in general.

Using graphic symbols

Graphic symbols are the simplest and most obvious type of symbol. When you create a Flash movie, you create objects on the Stage. Some objects may remain still, such as backgrounds. You animate other objects — after all, what is Flash for? Use graphic symbols for collections of static objects or for animation.
You create graphic symbols to reduce the size of your file and to make it easier to add multiple copies of a graphic to your movie. Symbols are stored in the Library and are available to not only the movie in which you created them but also any other movie. Therefore, using symbols is a good way to store graphic images for use in Flash movies. You don't have to re-create the wheel.
Flash ignores sounds or actions inside graphic symbols. Actions are the key to creating interactive movies. For that reason, turn animation into graphic symbols only when the animation is simple. Graphic symbols are always placed on the main Timeline of the movie.

Using movie clip symbols

A movie clip is like a movie within a movie that you can manipulate by using interactive controls (also called actions, created with ActionScrip). Movie clips are crucial for complex animation and especially interactive animation. A movie clip doesn't take place on the main Timeline; instead, it has its own Timeline. For example, you can go to a movie clip at any time, play it, and then return to where you left off on the Timeline. You can also attach movie clips to buttons.
Flash comes with several components, special movie clips that allow you to add user interface elements — such as radio buttons, check boxes, and scroll bars — to your movies. Choose Window --> Components and drag one of your choices to the Stage. Then choose Window --> Component Parameters to set the parameters of the component. For example, you can insert a list box and then add all the items (called labels on the Component Parameters panel) you want on the list.

Using button symbols

Button symbols create buttons — those little graphics that you click in Web sites to take you to other places on the site or the Internet. In Flash, you can use buttons in the same way, but you can also use buttons to let viewers decide whether they want to see a movie — when they click the button, the movie starts. You can also use advanced scripting to create buttons that control interactive games and other viewer activities. However you want to use buttons, button symbols are the way to start. You can add movie clips and interactive controls to buttons.


Flash Symbols

Basic concepts of flash symbols - graphics, buttons and movieclips

In this tutorial you'll learn the basic concepts of Flash symbols, symbol types (graphics, buttons and movieclips), creating and using them.

What is a Flash Symbol?

A symbol is a reusable object used/created in Flash. A Symbol can be reused throughout your movie or imported and used in other movies. There are three types of symbols: Graphics, Buttons, and Movieclips.
A copy of a symbol used in the movie is called an Instance, which can have its own independent properties (like color, size, function, etc.) different from the original symbol. All symbols used in a flash movie are stored in the Library from where you can drag-and-drop new instances of the symbols into your movie. When a symbol is edited all of its instances get updated, but changing the properties, effects or dimensions of an instance of a symbol does not affect the original symbol or other instances.

Importance of using Flash Symbols

Using flash symbols is very crucial to the file size of your Flash movie. The Flash file size depends largely on the size of all the graphics and texts used in the movie (both symbols and non-symbols) - here the major advantage of using symbols is that a symbol's size is taken into consideration only once even if it is used a hundred times - this is the true power of Flash. Unused symbols in your library are not counted in the size of your movie.
Important Tip: Get used to using symbols in flash right from the beginning and name them neatly for easy maintenance. It is a very tough job optimizing your file size if you don't use symbols from scratch!

The Three Types of Symbols

Graphic symbols are reusable static images that are used mainly to create animations. Any drawn vector/plain text/imported bitmap (photo), or combinations of these, can be converted into a single controllable object: as a graphic symbol. They have only one frame in their timeline. Learn how to create a graphic symbol.

Button symbols are used for timeline navigation - They add interactivity to the movie and respond to mouse clicks, key press or rollovers/rollout, and other actions. You define the graphics associated with various button states (Up/Over/Down/Hit), and then assign actions to the instance of a button. They have 4 frames in their timeline - one each for the up, over and down states, and one to define the hit area of the button. Learn how to create a button symbol.

Movieclip symbols are reusable pieces of flash animation - consisting of one or more graphic/button symbols - thus they are flash movies within your flash movie. They have their own non-restricted Timeline (any number of layers and frames - just like the main timeline) that plays independent of the main movie's Timeline. The best thing about using movieclips is that you can control them from actionscript - you can change their dimensions, position, color, alpha, and other properties and can even duplicate and delete them. Learn how to create a movieclip symbol.

Reflection for Apps 3 - Kelas Authoring Minggu Ke 12 (10 Mei 2012)


Salam...
Hari ni di dalam Apss3 - Creating Animation.

Reflection for  Apps 3

First Tutorial : Create an animated bouncing ball that could change its positions, colours and size along preferred timeline.


1.      Gunakan “Oval Tool”untuk lukis bentuk bola. 
2.      Warnakan bola dengan menggunakan “Paint Bucket Tool”.
3.      Setelah siap lukis bola, Klik “Modify” pilih “Convert to Symbol” namakan bola tersebut type pilih “Graphic” dan klik “Ok”.
4.      Pilih frame 10 dan right klik dan pilih “Insert Keyframe” dan ubah kedudukan bola mengikut kehendak anda.
5.       Langkah 4 diulang sehingga bola terjatuh di atas lantai.
6.       Ubah warna background dengan cara : Right Click on stage > Document Properties > Change the Background Colour
7.       Untuk melihat hasil, klik pada “Control” dan pilih “Test Movie”.


Beberapa perkara yang perlu diambil perhatian :
1-      Change its positions - using motion tween. Using insert key frame, edit the place of the ball.  Move the marker first before you put the motion of the ball.
2-      Change its colours -click at the ball -  properties - colour effect - style - tint
3-      Changes size of ball - click at the ball - using free transform tools - edit the size of ball using symbol - graphic, button and movie clip
  

Second Tutorial : Create a new file and change a text form into a any shape 

Langkah-langkah 
1) Taipkan teks
2) Pilih modify kemudian breakpart untuk asingkan huruf dalam perkataan
. do it again go to modify n choose breakapart. insert keyframa(f6) in frame 25. In frame 25, delete the text n draw a star, using poligon tool. click any frame between frame 1 to 25, n go to properties, tween n choose shape. done.

Third Tutorials : Use motion guide technique to guide ant move a long the tunnel .

Saya ubah jadi Sizuka gi sekolah masih guna motion guide.

1) Create a background layer to show Sizuka and the pathway of the bus.
2) Right Click on  layer and select "Add Classic Motion Guide".
3) Insert keyframe at frame 5, 10, 15... 75
4) Rotate the bus position to show that it is facing the right direction while moving
 5) Right click somewhere between the 1st and the 75th frame layer and select "Create Classic Tween"
6) Check the tween's properties. Make sure "Orient to Path" is selected
7) Adjust the frame rate at the bottom of the Timeline to "10" fps to show that the "bus" is moving in slow motion
8) Untuk melihat hasil,  Ctrl- Enter.
9) Tambah frame pada layer jika paparan terlalu pantas. Insert Keyframe selepas frame 25 bagi membolehkan paparan akhir dipaparkan lebih lama.


Fourth Tutorials : Try to animate the cartoons mouth by applying frame by frame technique in Adobe Flash.

Saya buat animasi sempena hari guru. Banyak frame digunakan. FPS dikurangkan untuk memastikan penonton dapat memerhatikan gerak mulut guru tu.

1)      Trace a teacher picture.  Save in layer teacher
2)      Insert keyframe, change mouth and teacher eyes.
3)      Repeat the process sehingga hasil dikehendaki tercapai.
4)      Saya masukkan image sebenar dan sedikit ucapan sempena hari guru 2012.
5)      Untuk melihat hasil,  Ctrl- Enter.
6)      Tambah frame pada layer jika paparan terlalu pantas. Insert Keyframe selepas frame 25 bagi membolehkan paparan akhir dipaparkan lebih lama.


Friday, 4 May 2012

Instructions : Animating the Cartoon

Salam...

Belajar sendiri berbantukan youtube... melukis kartun menggunakan Flash CS3.
Untuk hari ini belajar melukis secara menekap gambar asal... or onion skin tools.


Onion skin tool is an interesting tool that helps you throughout your drawing.

Belum berjaya melukis kartun... cuba buat logo dulu...


Cuba menekap gambar yang rasanya paling mudah... setelah puas menggoogle...


GAMBAR ASAL

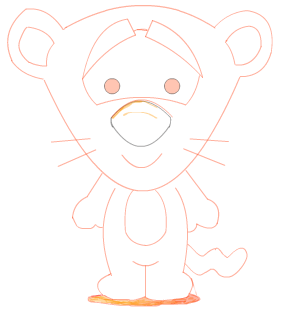
HASIL MENGGUNAKAN ONION SKIN TOOLS. 
he.. he... kena gelak je ngan mouse kalau ada tiger macam ni...

Hasil kerja terkini... pada Sabtu 5 Mei 2012...


 Alhamdulillah... berjaya juga akhirnya.


Berikut pula adalah langkah seterusnya jika dah boleh lukis kartun banyak2... buat animasi pula...


Instructions : Animating the Cartoon

First
Open a new Flash FLA movie: Click "File" on the menu bar and choose "New." This opens the New Document dialog box. Click "Flash File (ActionScript 3.0)."

Second
Import or draw the first frame of your cartoon on the stage. You can create your cartoon frames in an external drawing program, such as Illustrator, or use Flash's drawing tools to draw them. Each frame in an animation is called a "pose." Each pose is a slight variation of the previous pose.

Third
Right-click the next frame in the Timeline panel and choose "Insert Blank Keyframe" from the fly-out menu. A blank keyframe gives you a blank stage for creating the next pose.

Fourth
Import or draw the next pose on the stage, changing the pose slightly. What you do here depends on the type of animation you want. If your animation simply shifts an object from one location to another on the stage, move the object slightly in the direction you want it to shift. To simulate the movement of one or more body parts, reposition, or create a new pose from, the parts of the cartoon figure you want to animate.

Fifth
Continue inserting blank keyframes and moving and manipulating your object in each frame until you have completed the animation sequence.

Sixth
Test the movie (click "Control" on the menu bar and choose "Test Movie"). The animation should play frame by frame just as you manipulated it across the stage and timeline.

Thursday, 3 May 2012

Kelas Authoring Minggu ke 11

Salam...
Hari ni masih guna Apps1... and Ipad... Kami belajar apakah fungsi shape tools di dalam Flash, berbincang aplikasi yang boleh dibina menggunakan Flash seperti web banner, games, courseware and animation.

Interaksi di dalam Flash juga pelbagai... antaranya menggunakan Button dan Hotspot, Text dan drag n drop.

Then, kami juga explore beberapa jenis text box yang terdapat dalam Flash.
Antaranya :
a) Static text - digunakan untuk memaparkan aksara yang tidak perlu diubah. Contoh... arahan untuk pengguna atau perkataan biasa.

b) Input text - digunakan apabila ingin mendapatkan maklumat dimasukkan oleh pengguna. Pengguna boleh menaip masuk maklumat di ruangan yang disediakan.


c) Dynamic text - use when we need to display character that are updated or that change at runtime.


Hari ini kami diperkenalkan pula dgn Apps2... di dalamnya mengandungi youtube cara-cara melukis menggunakan Flash CS3. Interesting... seolah2 berada di oversea pula walhal kat oversea... budak tadika dah pegang ipad.

Hari ini belajar Basic Drawing dulu...lukis garisan, lukis objek guna line tool dan selection tool. Kemudian cuba warnakan... Best juga sebab inilah peluang untuk mempamerkan bakat melukis yang tak seberapa...

Inilah hasil nya...(3 Mei 3012)


Cuba lagi edit.. (4 Mei 2012) ada bhgn yang tak boleh di warnakan guna paint bucket... ada kebocoran kot... tapi dah puas check... entah kat mana...


Bila org matematik di suruh melukis... inilah hasilnya...
Tak pe... boleh diperbaiki... insya allah...


Hasil terkini pada 5 Mei 2012. Setelah belajar dengan kengkawan iaitu Fadlee dan Halizah.

Thursday, 26 April 2012

Kelas Minggu ke sepuluh (26 April 2012)

Salam...
Mula belajar Flash dengan Cik Nurul Farhana... alhamdulillah... muda lagi adik ni dah buat PHD... Kami di kehendaki menjawab beberapa soalan berkaitan flash... ada pra dan post test... Selalu buat kat anak murid... hari ni, merasa lah pula... Antara yang disoal ialah penggunaan Text Tools di dalam Flash...Beza antara fungsi pencil tool dgn brush tool... 


Seronok kerana mula belajar guna Ipad. Tak pernah pun guna... walau pun share dgn Halizah... ok le tu...
Kami mula explore Flash guna Ipad... di dalam nya telah tersedia nota tentang flash. Antaranya interface, application of flash dan types of interaction di dalam flash

Kita boleh gunakan flash untuk buat : 

1) web banner
2) animation (tak nak gerak pula kambing ni)

3) games 
4) courseware

Antara interaksi yang boleh diimplemen di dalam pembinaan courseware yang menggunakan Flash ialah...
- Button and Hotspot
- Text 
- Drag & drop function...


Terjumpa satu directory yang ajar flash dari awal... bagusnya... skrg ni nak baca buku memang tak sempat... so, kalau nak belajar dari youtube... boleh saja... tapi pastikan tugas hakiki di sekolah dan rumah telah selesai dgn sempurna. Then buka dua komputer... belajar lah dari youtube tu...

A beginner tutorial on creating a simple banner ad in Flash CS5
http://www.danscourses.com/

 So, selamat bergembira belajar Flash guna Ipad...


Thursday, 19 April 2012

Kelas Minggu ke 9 (19 April 2012)

Salam...
Belajar buat online questionaire...
Bagus.  Sedang cuba menyiapkan untuk latihan...
May be masa buat projek nanti boleh guna...
Antara contoh questionaire di web pages...

Agak sibuk minggu ini... Alhamdulillah Dr Zaida tambah masa untuk siapkan tugasan 1.
Hantar pada 11 Mei... Ya Allah... bantulah hambamu ini...

Thursday, 5 April 2012

Kelas Authoring Kali Ke 7 (5 April 2012)


Salam Authoring System...

Jumpa lagi untuk belajar membina Aplikasi Pengurusan dan Penyelenggaraan Halaman Web.

Alhamdulillah latihan yang Dr Zaida beri minggu lepas dapat dibuat dengan jayanya...
Maka hari ini bolehlah belajar dengan bersemangat...

Sebelum ni belajar tentang masuk data, papar data, semak login dan security untuk web pages...
Hari ini menyambung aktiviti mengurus halaman web... .

Dari bahan kuliah yang dibina minggu lepas, ia digunakan untuk diubahsuai... dipadam... dicari... dan dipapar semula...

Setiap fail dibina dua kali kerana ada kesinambungan antara setiap fail... Awalnya agak susah... Terutamanya bila dah masuk server behavior... agak pening nak memaham... kena buat 5 kali baru faham... kesian-kesian... Tadi masa buat kat lab... tak boleh function pun... nak kena buat semula weekend ni... Insyaallah... cukupkan masaku Ya Allah...